Beginner Friendly Lash Extensions Manual | Arison Lashes
HEALTH AND SAFETY

- Personal hygiene- you must thoroughly wash your hands using an anti bacteria hand wash , nails should be manicured, hair should be clean and tied back, no strong perfume, keep a fresh breath and wear a face mask.
- Salon/beauty studio - you must always clean your salon and disinfect it and you must have a dustbin as you will be using it more frequently. The working environment must be a dust free one.
- Equipment/accessories- use alcohol to sterilize them prior to and after appointment. Make sure you store them in an orderly manner were its out of reach of children and easy for you to reach.
PRODUCTS AND SOLUTIONS
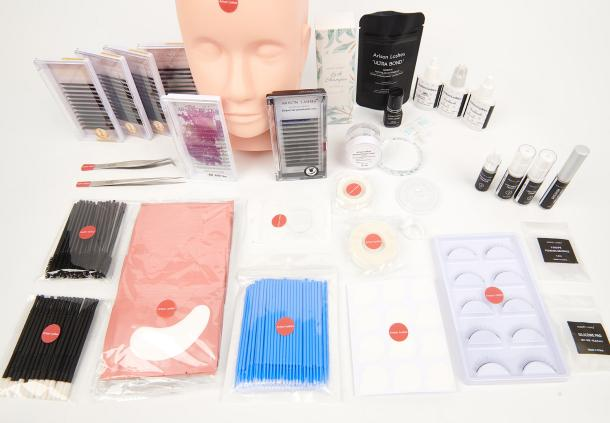
- Lash extensions - make sure you source your lashes from a good and professional vendor with good quality. The lash quality greatly affect the finished lash effect. All lash types available since different customers prefer different types and i suggest mixed trays so as to be able to meet the needs of many clients. Before using on a client test them on a mannequin or a model to see if the lash quality is good .
- Glue-use waterproof adhesive glue which is long lasting. Store it nicely in a glue storage tin for good humidity. Use clear glue for colorful lash extensions and a black one for the black lash extensions. Always make sure your glue does not fume or have any effect to the client’s eyes. Do not use one glue for more than 5 weeks.
- Tweezers-These needs extra care. After use, disinfect and put in the tweezers case. Tweezers can be dangerous, so during the process make sure you put them on a clean surface out of reach of client so that it wont hurt them. Tweezers also affect the time you take during installation. Different lash technicians prefer different tweezers.Use tweezers that works best for you .(isolation tweezers and installation tweezers )
- Lash cleansing foam -use oil free professional lash cleansing foam. Do not use hair shampoo.
- Lash primer -use a liquid consistency primer to disinfect lashes before application. It is designed to remove residual cosmetics and natural oils for maximum adhesive bonding.
- Lash remover - use a good remover without any effect to the client and always make sure to leave the bottle tightly closed. The type of the remover to use would depend on own customer preference but i would advice athick cream-like consistency remover which is easy to apply and sits on the lashes very well without running into eyes or skin.
- Lash accessories -Always make sure you get these small accessories in bulk because they greatly affect your application process. The accessories package includes eye gel patches,disposable mascara brush wands, micro applicators brushes and glue rings
.
PREPERATION BEFORE APPLICATION

STEP 1.Consultation - Welcome your client and make her feel comfortable . Tell her about the process and the risks involved . Ask her about the style, length, curl, color and effect she prefer . You may even advise her on the best style to choose considering her eye shape and size.
STEP 2.TAPING -Tap down the bottom lashes using a soft fabric tape so as to begin prepping the eye area.
STEP 3.Cleansing - Apply a small amount of the cleansing foam directly onto the client’s eyelashes. Remove the dirt makeup with a lash foam brush. Wash the residue of the foam cleanser with distilled water. Dry the wet lash with a lash drying fan.
STEP 4.Priming - Apply a small amount of primer on two disposable micro applicators. Place one brush beneath the lashes and the other one on top of the lash.Swipe through the natural lashes cleansing each lash thoroughly.
APPLICATION

STEP 1 Arranging the lash pallet -Apply the required lashes to your pallet. Put the lashes in numerical order from the smallest length to the longest length for quick identification. Always know the length you are dealing with.
STEP2 APPLY THE EYE PADS - Ask the customer to keep her eyes wide open. Gently place the pads over the lower lashes covering all the lashes. Make sure that the lower pad does not get to the eyes water line. Ask the client to close her eyes and adjust the pads until she is comfortable. Use the tap to secure the eye pads.
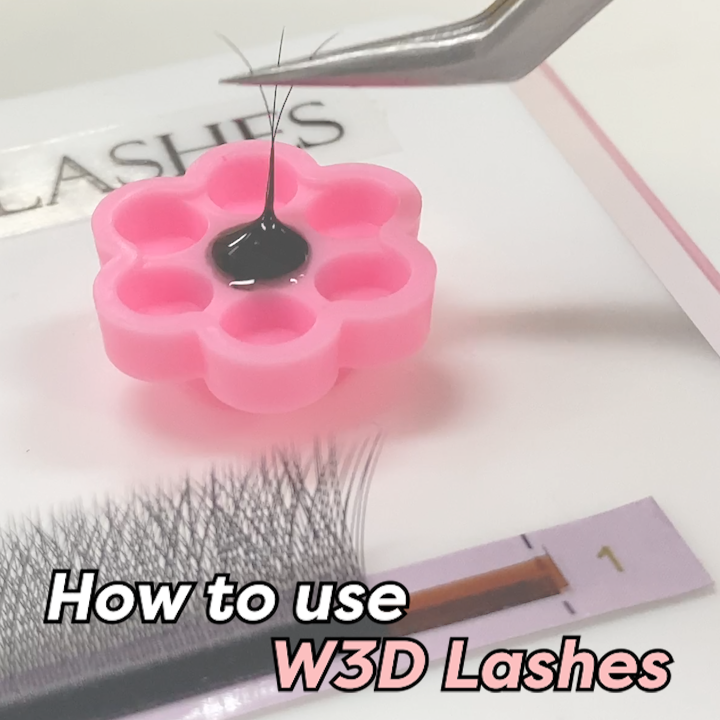
STEP 3 PREPARING THE HAND PALLET AND THE GLUE RING - Make sure everything you need is all close to you and you are in a comfortable state before you start. Shake well your glue before use and put a drop of glue in your glue ring.
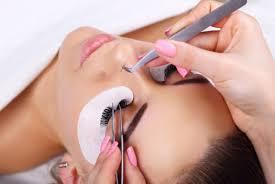
STEP 4 SEPARATE THE NATURAL LASH -Use your isolation tweezers to separate the natural lashes until you isolate one single lash.
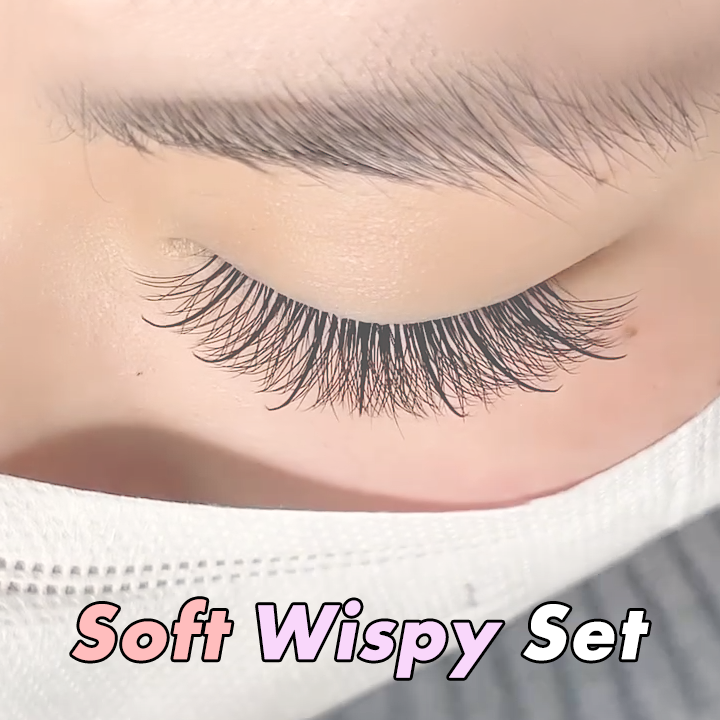
STEP 5 CHOOSE EXTENSION -Always use at least three different lengths of extensions that range from 6 mm to 14 mm in length. It is best to use 8 mm lash extensions in the inner corners of the eye to avoid avoid an artificial clownish look. It is also important to use 8 mm extensions all across the eye, between the longer extensions to create a thick lash line. Failure to mix in short extensions results in empty gaps that make the long extensions look similar to spider legs. For a dramatic look, opt for the thickest (0.25mm) curly extensions. Finer extensions create a more natural look.
STEP 6 DIP THE LASHES INTO THE GLUE DROPLET -
While holding the extension from its tapered end, dip the extension into the adhesive; make sure there is ample adhesive at the base of the extension. Swipe off any excess prior to applying.Make sure you change the glue in every 20-30 minutes and do not add fresh glue the old glue droplet .
STEP 6 SWIPE -Swipe the extensions along the natural lash. Coat the natural lash with adhesive from base to tip with no gaps in the glue.
STEP 7 SEPARATE -No two extensions or natural lashes should be stuck together. Use both sets of tweezers to separate any extensions from neighboring lashes and or extensions. Grasp and separate in a horizontal manner; best done while the adhesive is dry, but not fully cured. Never pull in a vertical direction or place any tension on natural lashes. Repeat the application and separation steps until every natural lash is bonded.
STEP 8 DRY -When all natural lashes have an extension securely bonded, it is time to dry the newly adorned lashes for three minutes. Mist with distilled water, dry again for three minutes and perform one final round of separation.
STEP 9 REMOVE TAPE AND EYE PADS - Gently remove the tape then carefully lift all the lashes off the eye pads by placing the tweezers under the lashes and lifting. Gently lift the gel pad away from your client’s eyes.
STEP 10 BRUSHING - Do a final brush of the lashes using a lash brush wand.
AFTER APPLICATION

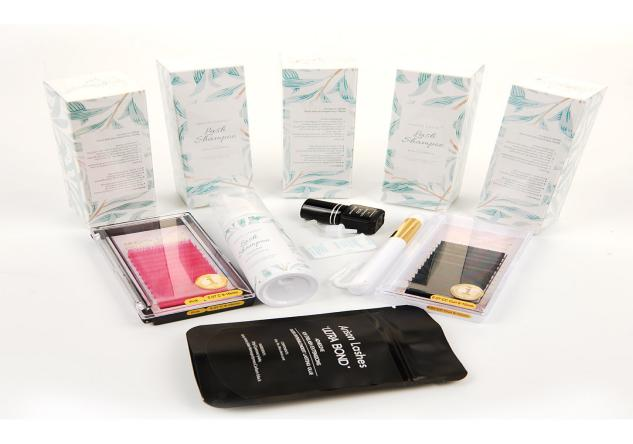
STEP 1 PROVIDE LASH CARE PROCUCTS -Provide to customer the products of how to care for the extensions lashes. Provide her a lash brush and a cleansing foam if you do not have it you could direct her to a shop she could buy it from and then instruct her on how to use and how to care for the lash extensions to avoid premature falling.Caution your client not to make her lashes wet in the first 24 hrs for them to bond well and for the glue to thoroughly dry.
STEP 2 EXAMINE YOUR WORK -Take this time to examine your work recording the length and pattern of the lashes. Ask for the how the customer feels and if she would want the same pattern the next time or if she would want some changes to be done.
STEP 3 CONDUCT CLEAN UP -Clean all tweezers with alcohol and store them in a tweezers case. Discard all disposable items such as the used eye patches and sanitize everything else. Clean the surfaces, change the bed lined, and make sure the whole salon is clean. Arrange the bar and put all the equipment and solutions you used to the original position as you wait for the next client to come in.
REFILLS


Refills are a great way to extend the life of your client’s lashes and are recommended every two to three weeks. The point at which the real lashes join the eyelash extension weakens over time due to oil or other impurities. Encourage your client to wash thoroughly before coming for a refill.
STEP1 Apply the eye pads and brush through the lashes to loosen the lashes that is about to come off .Carefully remove the loose lashes with a tweezers ,if too strong you could melt them with the remover.
STEP2 Ensure that your customer is comfortable and then start doing a refill, however, if your client lost more than 3/4 of the lashes she might have to book for a full set.
REMOVAL

As much as eyelash extensions makes the eyes look lovely, it does not last forever, remover would need to be done.
STEP1 carefully apply the eye pads and make sure you protect the skin under the eye as it is very soft and sensitive.
STEP2 Put some remover on two micro brushes and slide them on the lashes. Slide through the lashes until it loosens.
STEP3 Immediately follow with a cleansing foam before the client opens her eyes.
STEP4 Make sure you clean thoroughly and remove any access removers and any dirty residues.
ABOUT THE AUTHOR

Founded in 2010, Arison has become a top-tier eyelash vendor in the eyelash wholesale industry. Located in Qingdao, China, Arison happens to be in the hub of the largest eyelash production base in the entire country. Covering more than 15,000 square meters, employing over 800 skilled technical workers, we’ve quickly grown and have rapidly been expanding our business since being founded.
Arison always deliver the best eyelash products and services to you. As a lash wholesaler and major eyelash vendor, we now have three production bases where we produce eyelash extensions , strip lashes & custom eyelash boxes. Our production section covers various 2D, 3D, 4D, 5D, 6D, and even 10D Volume Eyelashes products. Arison also provides auxiliary tools such as false eyelash glue, cleaner, magnetic eyeliner, tweezers and much more.
Arison Lashes focuses on quality just as much as quantity when it comes to our factories of amazing eyelashes & eyelash accessories. With years of understanding the eyelash market, Arison knows about eyelash products and has been technically innovating the industry since arrival. We always try our best to follow customer demand, always trying to innovate to what customers want and need. All of this is done to ensure quality service overall.
The great ranges of eyelash grafting products we produce are all at reasonable, affordable prices. This is especially true when you compare Arison to other leading suppliers in the eyelash genre. Since we care about the quality the most you will not be buying some cheap knockoff of what could be. Rather, you’ll be getting a quality product at an industry breaking price.
With shipments to the United States, Europe, the Middle East, and other regions, we annually ship over 30 million products. We send our products after being thoroughly tested for quality, which is why people continue to make repeated purchases.
At Arison Lashes, we use a terrific scientific management and service system, which uses advanced production equipment in our eyelash factory that ensures the overall quality of all our products and services. All of our false eyelashes are produced in a dust-free and sterile eyelash processing workshop. We even use ultraviolet sterilization to properly disinfect everything.
We use quality inspection that will strictly check the lashes to ensure they are top quality before leaving the factor.
Leave a comment